Before I tell you about how I made these tasty apple whoopie pies this weekend for my DnD group, I am going to tell you a delightful little anecdote about whoopie pies.
My mom is from Maine, and she and I visited family there last December. There was a really awesome deli that we visited the day before we left that had whoopie pies that were seriously the size of dinner plates. I got a chocolate peanut butter one for the boyfrand, and a pumpkin one for me because I am and always will be obsessed with anything pumpkin.
Anyways, I decided to put them in my carry-on bag to try to deter some of the inevitable squishing that would occur. I was going through airport security and they kept bringing more and more people to look at the x-ray of my bag. Finally, they announce loudly that they needed to see the person who the bag belonged to so I ran over and they said they needed to go through my bag. All I had in there was a book, an MP3 player, some ear buds, and maybe a hoodie or something so I was super confused. The security guy yelled at me not to touch the bag, and then pulled out a plastic bag from my little canvas carry-on.
"WHAT IS THIS?" he said loudly.
"Um...whoopie pies." I answered back.
He then burst out laughing and had to go show all his security friends that the security threat was two whoopie pies in a bag. Needless to say, my family from Maine thought it was pretty funny. I was embarrassed and my whoopie pies got more smushed so I was really sad about it.
But now that I have told you my embarrassing story, onto the baking.
Here are your ingredients:

First things first, go ahead and preheat your oven to 350 degrees. Then you will need to take 1 (or more) baking trays and cover them with parchment paper. I ended up swapping out about 3-4 different baking sheets to make the process go a little faster.
 In a large bowl, beat your 2 cups of packed brown sugar and 3/4 cup unsalted, soft, butter. Once it's all nice and fluffy, beat in your 2 eggs and 1 teaspoon of vanilla.
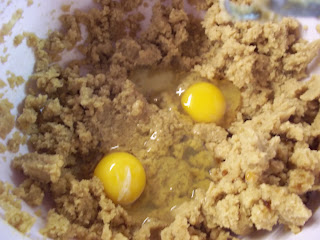
Add in 1 1/2 cups applesauce. If you are fancy enough to have your own homemade applesauce you can certainly use that, but I have never made my own applesauce, so I bought some unsweetened applesauce at the store and used that. Beat that in with the 3/4 cup whipping cream.


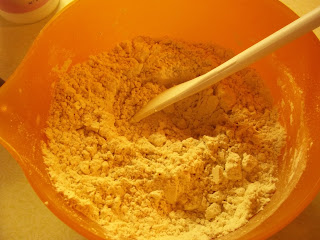
In another medium bowl, mix together your 2 3/4 cups flour, 1 tablespoon cinnamon, 1 teaspoon baking powder, 1 teaspoon baking soda, and 1 teaspoon salt.

My mom is from Maine, and she and I visited family there last December. There was a really awesome deli that we visited the day before we left that had whoopie pies that were seriously the size of dinner plates. I got a chocolate peanut butter one for the boyfrand, and a pumpkin one for me because I am and always will be obsessed with anything pumpkin.
Anyways, I decided to put them in my carry-on bag to try to deter some of the inevitable squishing that would occur. I was going through airport security and they kept bringing more and more people to look at the x-ray of my bag. Finally, they announce loudly that they needed to see the person who the bag belonged to so I ran over and they said they needed to go through my bag. All I had in there was a book, an MP3 player, some ear buds, and maybe a hoodie or something so I was super confused. The security guy yelled at me not to touch the bag, and then pulled out a plastic bag from my little canvas carry-on.
"WHAT IS THIS?" he said loudly.
"Um...whoopie pies." I answered back.
He then burst out laughing and had to go show all his security friends that the security threat was two whoopie pies in a bag. Needless to say, my family from Maine thought it was pretty funny. I was embarrassed and my whoopie pies got more smushed so I was really sad about it.
But now that I have told you my embarrassing story, onto the baking.
Here are your ingredients:

First things first, go ahead and preheat your oven to 350 degrees. Then you will need to take 1 (or more) baking trays and cover them with parchment paper. I ended up swapping out about 3-4 different baking sheets to make the process go a little faster.


Add in 1 1/2 cups applesauce. If you are fancy enough to have your own homemade applesauce you can certainly use that, but I have never made my own applesauce, so I bought some unsweetened applesauce at the store and used that. Beat that in with the 3/4 cup whipping cream.


In another medium bowl, mix together your 2 3/4 cups flour, 1 tablespoon cinnamon, 1 teaspoon baking powder, 1 teaspoon baking soda, and 1 teaspoon salt.


Slowly add in your flour mixture and beat it into the applesauce mixture until well combined.


Take smallish spoonfuls of the batter and place them about 2 inches apart on the baking sheet. It took me a little bit of trial and error to see how big to make the spoonfuls. My first batch of the cookies kind of baked together and I had to break them apart because my spoonfuls were too large. They were also a little too moist. But the subsequent batches were cooked better and a better texture.
Bake them for about 10-13 minutes or until the edges are a little brown.


Then you get to make the tasty filling!
In another bowl, add 1 cup of soft butter, 1/2 cup marshmallow fluff, 1/4 cup milk, 1/4 cup flour, and 1 teaspoon vanilla. Beat with a hand mixer until well mixed.

Bake them for about 10-13 minutes or until the edges are a little brown.


Then you get to make the tasty filling!
In another bowl, add 1 cup of soft butter, 1/2 cup marshmallow fluff, 1/4 cup milk, 1/4 cup flour, and 1 teaspoon vanilla. Beat with a hand mixer until well mixed.

Then you are going to add in more powdered sugar than you feel is good for you. But it makes it so tasty. So just push that part to the back of your mind. Add it in slowly or when you mix it, it will turn into a giant cloud and go all over your kitchen. Trust me on this one.

Once you have your filling finished, spread a generous amount on one of your apple cookies and then use another one as a top.

Your finished whoopie pies should look like this:


Your finished whoopie pies should look like this:

Yum! It made quite a lot of these. The recipe said it makes about 36 and I think that's probably pretty accurate. I would eat them pretty soon after you make them because they are still kinda warm and that makes the filling kinda gooey and just delightful.
You can also store them in the fridge for about 24 hours before serving them.
I hope you like these! I thought they were fallish and yummy. I am off to go bake a cake for work tomorrow that I will be posting for sure in the next couple days so check back soon!
As always, thanks for reading!
Apple Whoopie Piesadapted from Fall Baking, Better Homes and Gardens Special Interest 2011
<3, Carly
You can also store them in the fridge for about 24 hours before serving them.
I hope you like these! I thought they were fallish and yummy. I am off to go bake a cake for work tomorrow that I will be posting for sure in the next couple days so check back soon!
As always, thanks for reading!
Apple Whoopie Piesadapted from Fall Baking, Better Homes and Gardens Special Interest 2011
<3, Carly


